Contents
What’s this for?
This plugin is meant to load specific mm_base.unity3d files per head. It’s necessary for custom heads to be able to use their own tints ingame instead of depending on overlaymod and material editor.
What do I need this for?
If you install my head mods, I’m updating them all to use this, starting with Tina. Meaning it will now be necessary to prevent misaligned tints.
Does it work for males/any plans to have it work with males?
No. Not at the moment.
Requirements
- Bepinex
- BepisPlugins for your respective game (AI or HS2)
Download
Download for your respective game and extract the contents of the 7z archive to your game’s root folder.
DO NOT DOWNLOAD THE HS2 VERSION FOR AI OR THE AI VERSION FOR HS2.
Usage (for users)
No need to do anything special.
Usage (for modders)
To be able to use this, the first thing you need is a custom mm_base.unity3d. You can modify it with SB3UG. The idea is to set the offsets of the create materials to something that works for your custom head.
The only way to know what the good offset for your head is, is to load the asset bundle in Unity and modify the offsets until they look good with your tints. Either that, or set the offsets to 0 and use full UV space tints, though that will consume more VRAM and space than necessary (not sure for how long the VRAM would get consumed since these tints are supposed to be temporal).
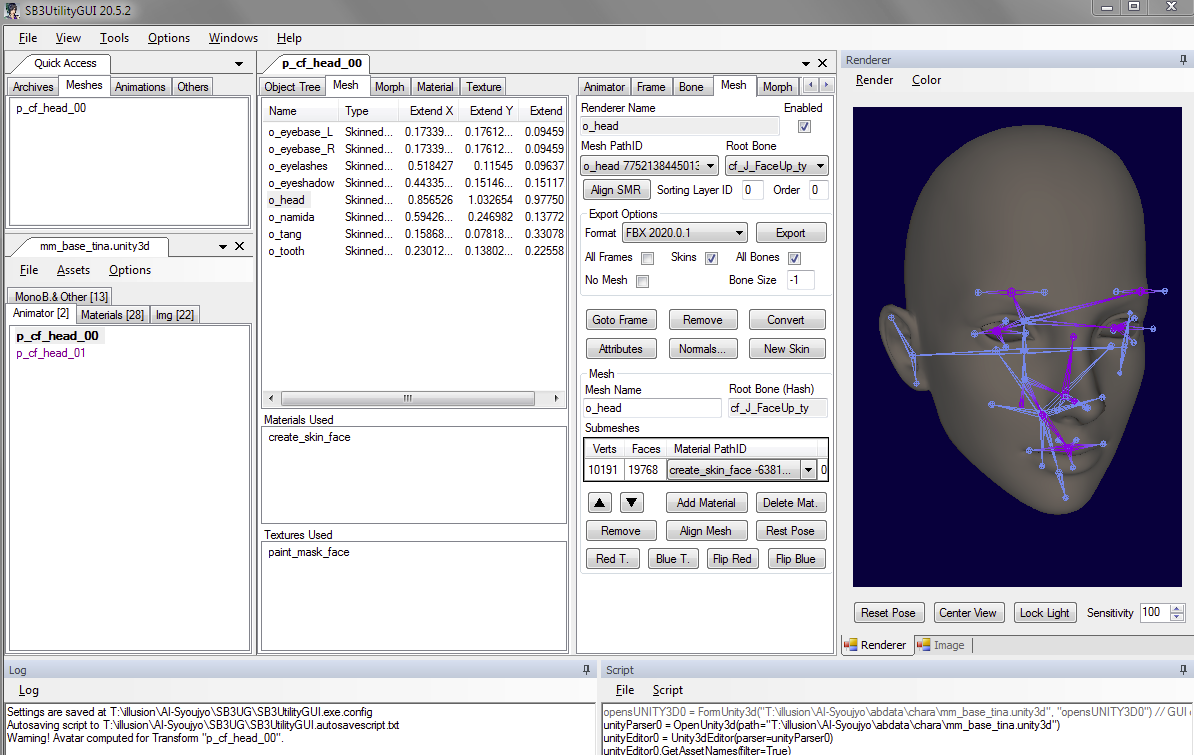
The mm_base you’re loading is just temporal (call it temp_mm_base_nameofyourhead.unity3d or something). You should copy the head’s prefab to it, and assign create_skin_face to the head mesh. Don’t change anything else.

Like this
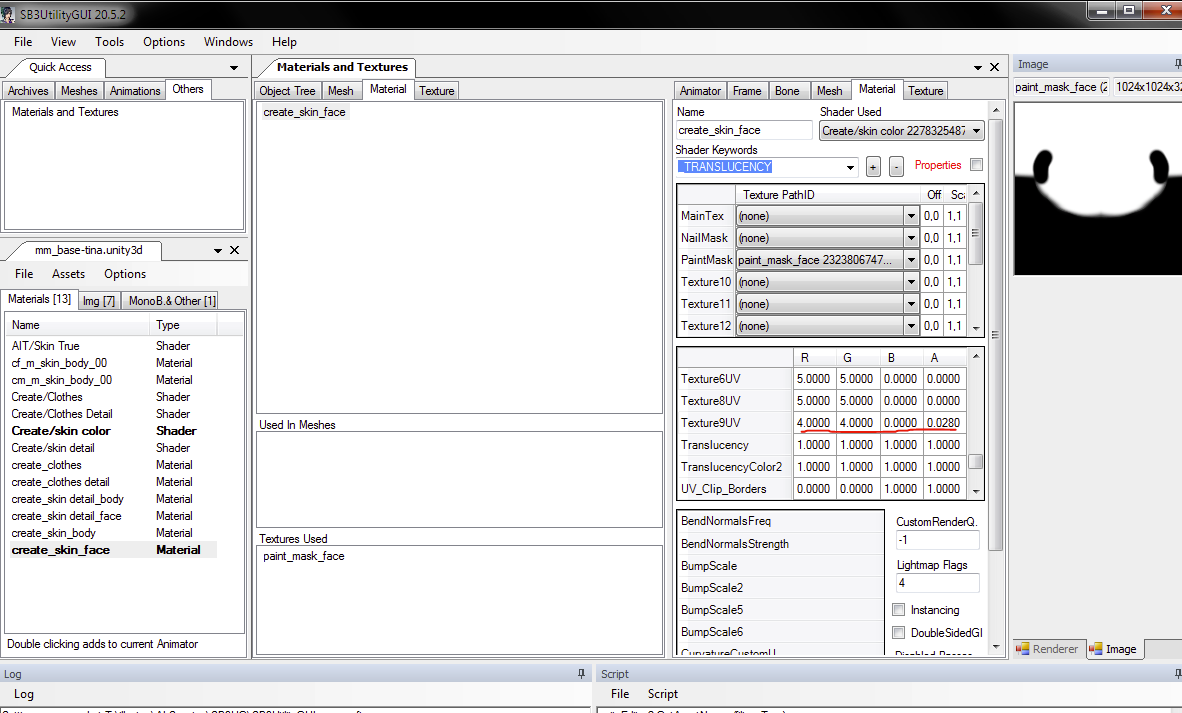
Then load the Asset Bundle, and its head prefab in Unity. Assign your main texture and the texture you want to align:

Notice how I changed the Texture 9 UV parameters. That’s the UV mapping for the lips.

The UV mapping goes as such:
- Texture 9: Lips
- Texture 10: Cheeks
- Texture 11: Eyeshadows
- Texture 12: Mole
- Texture 5: Paint 1
- Texture 6: Paint 2
The values for the vector are Scale X, Scale Y, Location X, Location Y
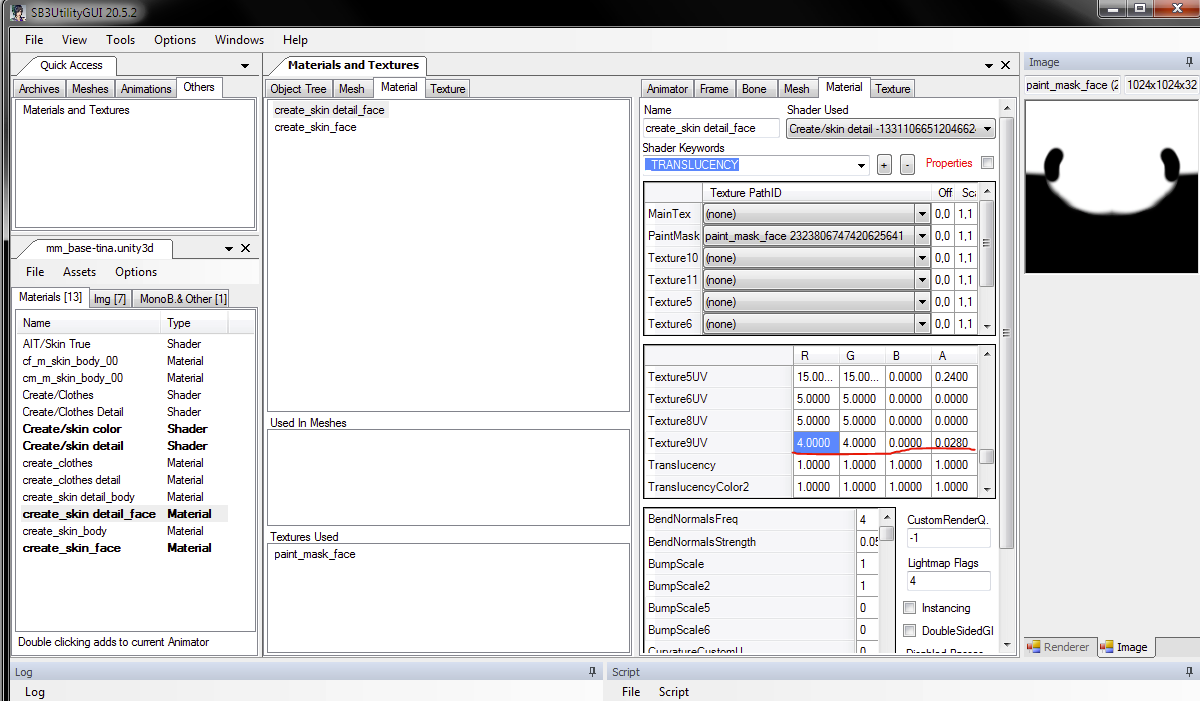
Once you have aligned everything to how you think it should look, you’re going to copy the original mm_base again, but this time you’ll call it mm_base-nameofyourhead.unity3d or something like that. Don’t copy any new prefabs into it. Just replace the Paint Mask for something that better fits your UV and set the same values for the parameters as you set them in Unity.

See what I did there?
Also, copy the same new parameters to the material create_skin_detail_face, as that one’s in charge of generating the gloss for the faces.
Finally, change the bundle’s CAB string to something different from the original (this is very important, otherwise you can get a white face). The CAB string always needs to be different, so remember than when doing more head mods.
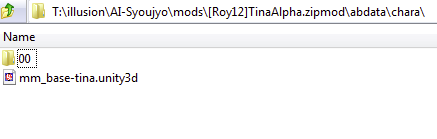
Now that you have your new mm_base, you want to bundle it somewhere in your zipmod (can’t do this with a hardmod). Put it anywhere with whatever name you’d like, but keep it named differently from the vanilla mm_base.unity3d. I did it like this:
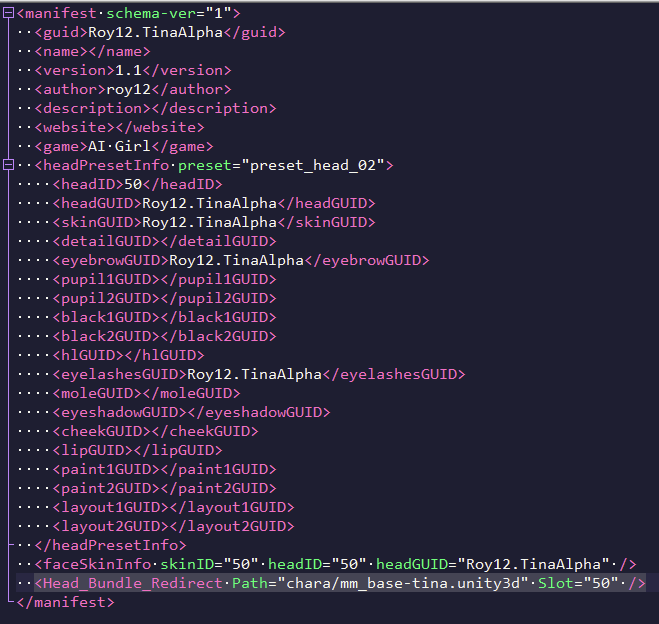
Then, in you manifest, you add a new line like this inside <manifest></manifest>:
<head_bundle_redirect path="chara/mm_base-nameofyourhead.unity3d" slot="yourheadID">So it looks like this:
Finally, pack your mod. Remember to now pack the tints too!
Result:
Thanks
Thanks to essu for making this possible. He has no site I know of or even a github.
He also gave me the source.
Source
Here’s the source for the plugin, I think the source is HS2 only so you’d need to change it for AI if you want to do something to it.