Since the cards become huge once they’re saved with SSS textures, I decided to not release the cards along the SSS textures and let you set them and customize the girl to your liking.
Here’s a guide to set these textures and get them good to go.
Remember that you need Next Gen skin and the graphics plugin installed first for any of this to work. Also I recommend OrangeSpork’s fork of the graphics plugin, since it has an autoloading feature for whenever you want to play the actual game and pork the girls instead of playing in the studio.
- Next-Gen Shaders 2.0 for AI/HS2 (older versions are no longer supported)
- OrangeSpork’s Graphics Plugin fork (VR is optional for this use case, you can just get the graphics plugin alone if you don’t need VR)
- Material Editor (Alternate link here, look for it)
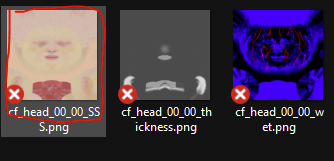
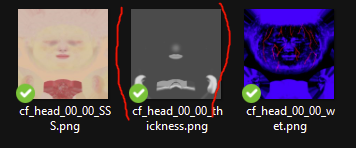
Once you download SSS textures, you’ll notice there’s 3 textures in the package:
cf_head_00_00_SSS.png, cf_head_00_thickness.png and cf_head_00_00_wet.png. Ignore the jpg file included, since that’s just a preview.
Contents
LOAD GIRL IN MAKER
First thing you want to do is load your girl, and make sure she got the body you want from Uncensor Selector first, since every time you change the body you have to reconfigure the body shader from the defaults.
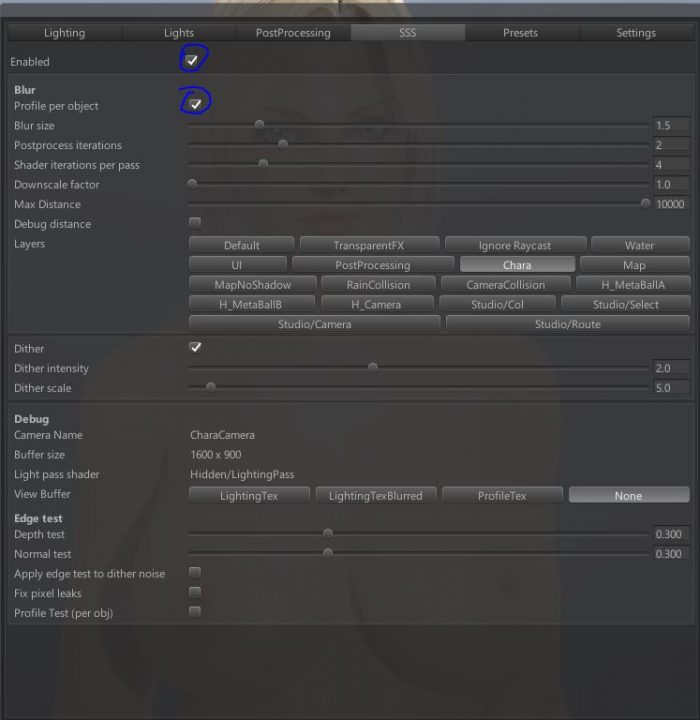
OPEN GRAPHICS PLUGIN
Open the Graphics plugin settings (default key is F5) and make sure SSS is on (OrangeSpork’s has it on by default, but set the downscale factor to 1 if it’s any higher, since otherwise you’ll get ugly aliasing everywhere.
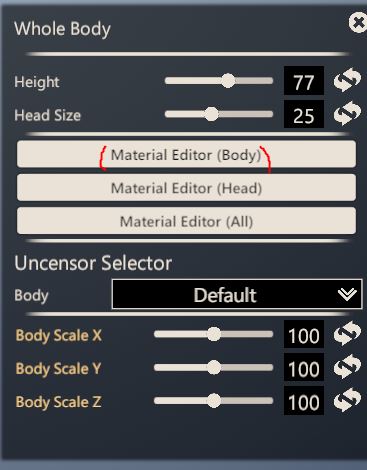
OPEN MATERIAL EDITOR FOR THE BODY
Now go to body settings in the maker, and click on Material Editor (Body)
SET NEXT-GEN SHADER FOR BODY
Here, look for Shader, set it to Next-Gen Body:

SET BODY PROFILE COLOR
Set the profile color to this. You can edit it later.
As of 2.0 it’s no longer necessary to do this.
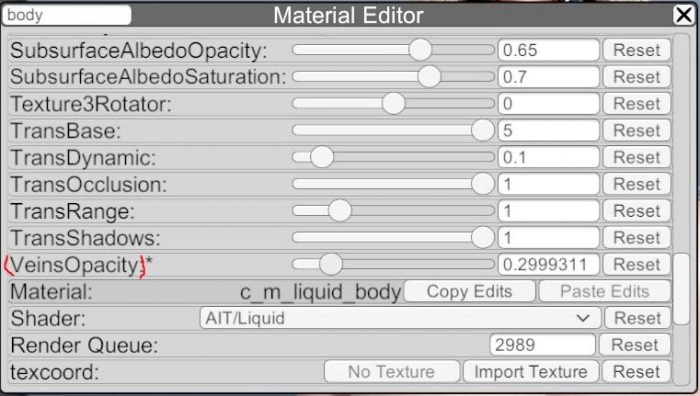
SET VEINS OPACITY (Optional, can do it later)
Also set the veins opacity to whatever you want (you’ll see the effects in real time).
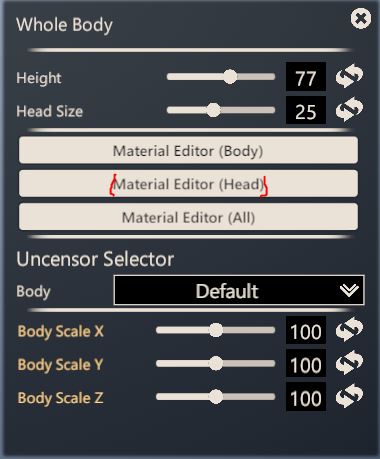
OPEN MATERIAL EDITOR FOR HEAD
Close that window, now back in the maker UI, click on Material Editor (Head)
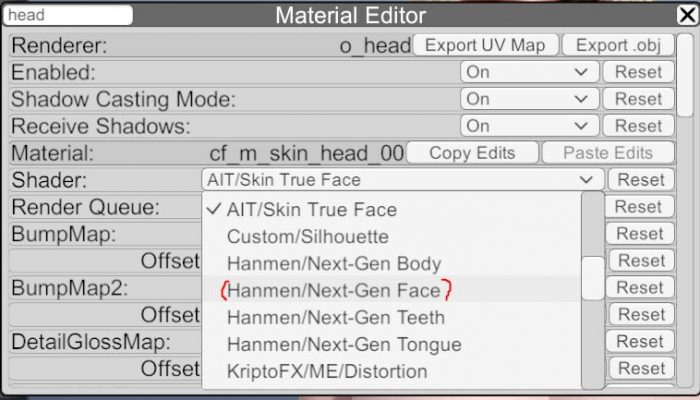
SET NEXT-GEN SHADER FOR FACE
Set the shader to Next-Gen Face.
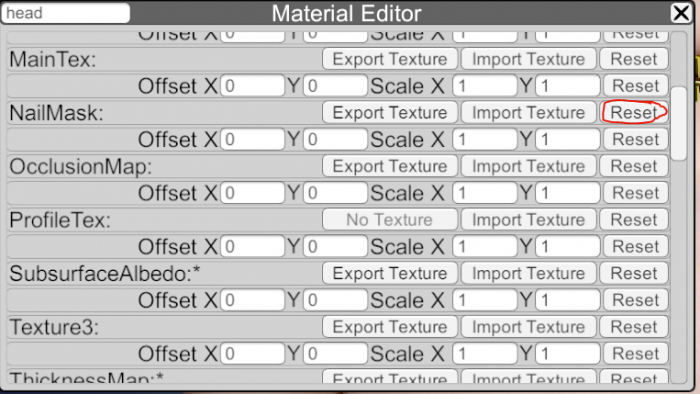
RESET FACE NAILMASK TEXTURE
If you’re editing a girl who had Next Gen versions previous to 2.0, click Reset for the NailMask:
SEARCH FOR FACE SS ALBEDO TEXTURE
On SubsurfaceAlbedo, click on Import Texture.
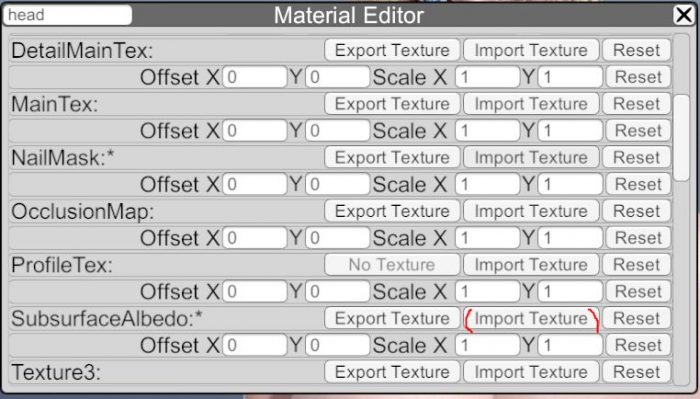
LOAD FACE SS ALBEDO TEXTURE
Double click on the SSS texture you extracted from the package.
SEARCH FOR FACE THICKNESS TEXTURE:
On ThicknessMap, click on Import Texture.
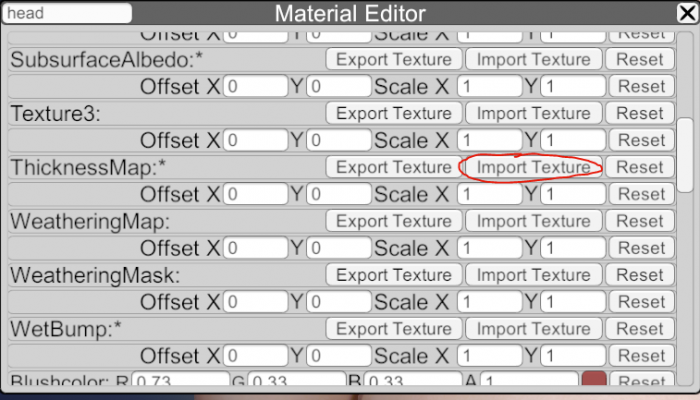
LOAD FACE THICKNESS TEXTURE
Double click on the thickness texture you extracted from the package.
SEARCH FOR FACE WETNESS TEXTURE:
On WetBump, click on Import Texture.
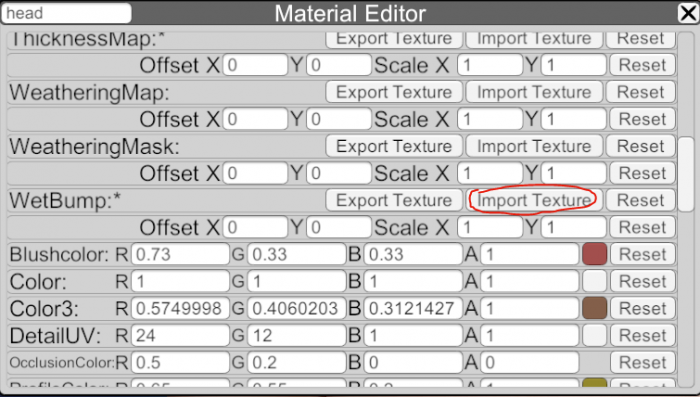
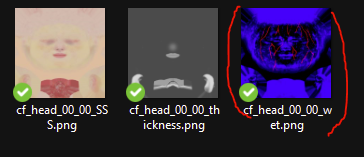
LOAD FACE WETNESS TEXTURE
Double click on the wetness texture you extracted from the package.
SET FACE PROFILE COLOR
If you’re updating to 2.0, here’s the default color Hanmen set:
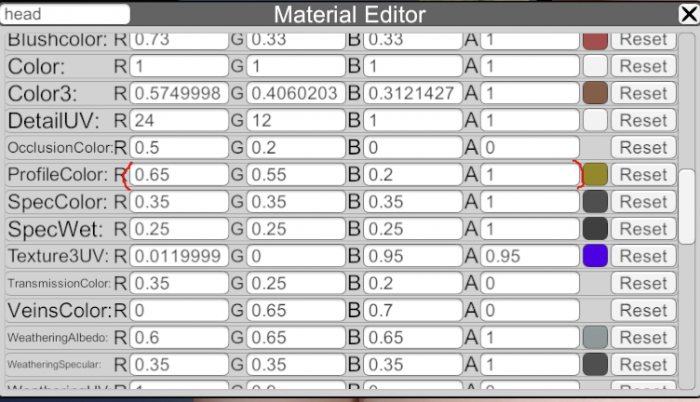
If you’re not updating, it will be set to these values already. Change them if you want, but remember to set the same values for the body later.
TWEAK TO YOUR LIKING
Everything is loaded, now you can tweak the girl’s colors, lips gloss, etc (you’ll need to since the Next-Gen shaders coloring isn’t the same as the vanilla shaders). You can also modify your SSS and graphics settings however you want, but that’s up to you and if you use OrangeSpork you want a profile per area.
Also, remember, if you change the uncensor with Uncensor Selector, you’ll have to set the body shader settings again, so take note of them if you make too many changes to its material settings.
Something else to have in mind, Uncensor Selector has a bug where if you load the maker from the room management screen and load a girl, she will load with the body without your settings. To work around this, just look for the girl in the cards list and load her again. It’s a problem with the maker’s startup.
Finally, if you find the hair transparency bugs to be a nuisance, get my modded hair shader from here or here.
You can also change the shader to Hanmen’s new hair shader, but it has issues with most of these ported hairs since it requires them to have rectangle UVs, and some of the scalps don’t have a rectangle UV.